Typed SignalR Clients - Making type-safe real-time communication in .NET

A small feature that was introduced during one of the previews of .NET 7 was typed SignalR clients enabling us to develop real-time tools with type safety. This means that we can make a shared contract that defines which methods can be invoked on the SignalR hub and which can be invoked on the SignalR Client. This is possible by using source generators which have been a huge focus in .NET 7 in general. In this post, we will make a sticky note bulletin board in Blazor WASM and add real-time collaboration to it using a typed SignalR client to showcase how to use typed SignalR clients.
Project features
Before getting started with the actual project I want to outline the features that I would like for our real-time sticky note bulletin board.
Creating sticky notes
First of all, I would like to be able to create sticky notes and present them on a screen as yellow squares with text on them.
Writing text
I would like to be able to edit the text on the notes and for these changes to propagate to other users in real-time.
Moving notes
I would also like to be able to move each sticky note to be able to communicate association by proximity or order.
Deletion
After having written on the sticky notes I would like to be able to delete them again. I also want an option for deleting all sticky notes to clear the board.
Locking
When multiple users can move, write, and delete the same sticky notes then I would also like users to get a lock on a sticky note while they edit it i.e. so that others can intervene or move the note away while the user is writing on it. A disclaimer is that the only system concurrency-related education I have is on peer-2-peer systems and blockchains so I wouldn't use the same approaches as I have employed on a large scale system as they simply are my loose ideas for a concurrency heuristic.
The following image is a rough mockup of what I would like it to look like. But we might make changes as we go.
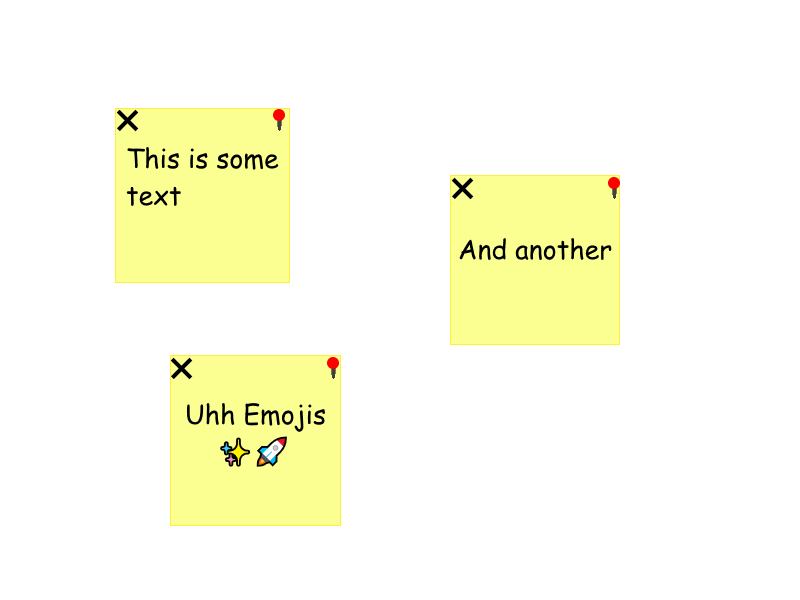
Solution structure
The solution will consist of three different projects that we need to make our bulletin board functional. We start by making a new folder and then a new solution file.
mkdir DistributedStickyNotes
cd DistributedStickyNotes
dotnet new sln
Shared
We need a small shared project in the form of a Class Library. This will hold the interfaces which define which methods the clients and the hub has and it will define our Note class which is what we will use to represent each sticky note. We create this project in a new sub-folder called Shared/ and then we will get back to filling out the actual content for it later.
mkdir Shared
cd Shared
dotnet new classlib
cd ..
Client
Next, we need the actual Blazor WASM client. This will present the sticky notes to each user and use the generated typed SignalR client. This is a really simple project with a single purpose so for this, we use the empty variant of the Blazor WASM templates.
mkdir Client
cd Client
dotnet new blazorwasm-empty
cd ..
Server
The last part is the server that will host our SignalR hub enabling each client to communicate indirectly. It will also maintain the state of the bulletin board being our single source of truth both with regards to the information about each note and its locks. For this, we create an ASP.NET API using the Minimal API template.
mkdir Server
cd Server
dotnet new webapi -minimal true
cd ..
Then in the end we add references to all the projects from the solution and add references to the Shared project from both the Client and Server projects.
dotnet sln add Shared
dotnet sln add Client
dotnet sln add Server
cd Client
dotnet add reference ../Shared
cd ../Server
dotnet add reference ../Shared
cd ..
Then we can start coding in whatever IDE is your favourite. Be that Rider, Visual Studio, Emacs, or something else.
Communication interface
The first part we create is the interfaces that define the contract that the clients and the server will follow to communicate with each other. Before we make the interfaces we create the model that will represent a sticky note as we will use this to parse information between the client and the server. We create this in the Shared project.
Note.cs
public class Note
{
    public Note() { }

    public Note(double x, double y)
    {
        Id = Guid.NewGuid();
        LastEdited = DateTimeOffset.UtcNow;
        X = x;
        Y = y;
    }

    public Guid Id { get; set; }
    public string Text { get; set; } = string.Empty;
    public double X { get; set; }
    public double Y { get; set; }
    public string? LastLockingUser { get; set; }
    public DateTimeOffset LastEdited { get; set; }
}
We define two constructors. One that is empty will be used for deserializing the model when receiving it. The second constructor takes a position as we always want to know where to place a new Note. This also sets the Id to a new random Guid which we will use to identify the Note. It also defines that the Note has been edited right now as it was constructed. We have some other properties that we don't set in the constructor. We have the Text which is what will be displayed on the Note and we have LastLockingUser which we will use to identify which user currently has the lock for editing this.
Next, we create the interface for which methods we want available to be able to call on the hub from the client.
IStickyNoteHub.cs
public interface IStickyNoteHub
{
    Task<List<Note>> LoadNotes();
    Task CreateNote(double x, double y);
    Task UpdateNoteText(Guid id, string text);
    Task<bool> LockNote(Guid id);
    Task MoveNote(Guid id, double x, double y);
    Task ClearNotes();
    Task DeleteNote(Guid id);
}
The methods all return Task as this communication is inherently asynchronous. Each of these is represented by one of the features that we wanted for our bulletin board.
We also have communication the other way i.e. server-to-client. For this, we create another interface representing the client and the things it will listen for.
IStickyNoteClient.cs
public interface IStickyNoteClient
{
    Task NoteCreated(Note note);
    Task NoteUpdated(Note note);
    Task NoteDeleted(Guid id);
}
These likewise return Task and enable the client to react to new notes being created, any changes being broadcasted, and when notes are being deleted.
Typed SignalR Hub
The next part is to implement the SignalR hub in the Server project. For this, we use the existing strongly typed Hub class and implement the IStickyNoteHub interface.
StickyNoteHub.cs
public class StickyNoteHub : Hub<IStickyNoteClient>, IStickyNoteHub
{
    // We will add the required methods here.
}
Before we actually implement the methods of the IStickyNoteHub interface we will need somewhere to store our sticky notes. We will make a very simple static class with a static collection in it. We could have used some service for managing this, but for the purpose of this demo, we will be okay with this.
StaticStorage.cs
public static class StaticStorage
{
    public static List<Note> Notes { get; set; } = new();
}
Then we are ready to implement each of the methods from our hub interface. First, we implement LoadNotes which is really simple to implement given our StaticStorage collection.
public Task<List<Note>> LoadNotes()
{
    return Task.FromResult(StaticStorage.Notes);
}
Then we add the method for adding a new Note CreateNote. This will create a new Note and notify all connected users that it was added by invoking the IStickyNoteClient method NoteCreated. When notifying that it was created it also sends the Note object itself so that the clients have a local copy of it. Together with the LoadNotes method, this ensures that each user has a local copy of all sticky notes that were created before the user joined and all notes that were created later.
public async Task CreateNote(double x, double y)
{
    var newNote = new Note(x, y);
    StaticStorage.Notes.Add(newNote);
    await Clients.All.NoteCreated(newNote);
}
Next, we implement the method for updating the text of a sticky note.
public async Task UpdateNoteText(Guid id, string text)
{
    if (StaticStorage.Notes.FirstOrDefault(note => note.Id == id) is not { } serverNote) return;
    if (!serverNote.TryLock(Context.ConnectionId, Clients.Others))
    {
        await Clients.Caller.NoteUpdated(serverNote);
        return;
    }

    serverNote.Text = text;
    await Clients.Others.NoteUpdated(serverNote);
}
The method takes the id of an existing sticky note and the updated text. We first go through all the notes and find the one that has a matching Id. If there was none then we simply return as the client must then have been in some bad state which we should ignore. Then we call the method TryLock on the Note which tries to lock it so that only this user can change it for a short time. If it was not successful in locking the sticky note then we update the original calling client with the current state of the note so that it knows that this is locked by someone else. If it was successful then we update the text and notify all other clients of this new state. We don't need to notify the original client in this case as it will optimistically assume that it could get the lock. Let's implement the TryLock method on the Note class now while we are here. To implement this we first need two secondary methods which will become useful in other scenarios: A method for checking if a user can lock and a method that sets the lock. We add the following method called CanLock to our Note model.
public bool CanLock(string? connectionId) =>
    DateTimeOffset.UtcNow.Subtract(LastEdited).TotalSeconds > 1
    || LastLockingUser is null
    || LastLockingUser == connectionId;
The method takes a connectionId which is the id of the user that wants to lock. We state that the Note can be locked if it hasn't been edited within the last second, if no user has locked it before, or if the last user that locked it was the one with connectionId. And then we create the method that actually locks. It does so by updating the time of the last edit to the current time and by setting the locking user to the given one.
public void Lock(string? connectionId)
{
    LastLockingUser = connectionId;
    LastEdited = DateTimeOffset.UtcNow;
}
Now, we can implement the TryLock method.
private CancellationTokenSource? cts;

public bool TryLock(string? connectionId, IStickyNoteClient others)
{
    lock (this)
    {
        if (!CanLock(connectionId)) return false;
        Lock(connectionId);

        cts?.Cancel();
        if (others is null) return true;

        cts = new CancellationTokenSource();
        ThreadPool.QueueUserWorkItem(new WaitCallback(async parameter =>
        {
            CancellationToken token = (CancellationToken)parameter!;
            await Task.Delay(1000);
            if (token.IsCancellationRequested) return;
            await others.NoteUpdated(this);
        }), cts.Token);
        return true;
    }
}
It first locks the Note which is simply to enforce that only one user can try to lock a Note at any one point. Then we check if the user can lock the Note and if it can't then we return false. Else we lock it. The user will have a valid lock for 1 second and after this everyone should know that the sticky note is no longer locked. We do this by waiting for 1 second on a new thread and then updating all other users with the new state. We only start this thread if the others parameter is not null indicating that we want to be informed once the note is free again. We parse a CancellationToken to the new thread which we will use to cancel notifying all other users if the lock has been reacquired within the 1 second which would extend its lock time so that we don't spam all other users with updates of the lock state while the user is continuously editing.
Next, we need to handle the moving of a sticky note. This will often be a long continuous set of updated coordinates over a period of time. For this reason, we want to ensure that the client has the lock for a note before they are allowed to start moving it. So now, we implement the hub method LockNote which returns a boolean indicating whether the Note was locked.
public async Task<bool> LockNote(Guid id)
{
    if (StaticStorage.Notes.FirstOrDefault(note => note.Id == id) is not { } serverNote)
        return false;

    if (!serverNote.TryLock(Context.ConnectionId, Clients.Others))
        return false;

    await Clients.Others.NoteUpdated(serverNote);
    return true;
}
Alike UpdateNoteText it also has the id of a sticky note as its parameter and tries to find that specific Note from our static collection. Next, if it did find it, it also tries to lock it and notify all other clients it was successful as that would change the state of the note. The client will wait for it to return before it continues and if it returns true then it knows that it can move the sticky note. The clients then update the position of the note by calling the MoveNote hub method.
public async Task MoveNote(Guid id, double x, double y)
{
    if (StaticStorage.Notes.FirstOrDefault(note => note.Id == id) is not { } serverNote) return;
    if (!serverNote.TryLock(Context.ConnectionId, Clients.Others))
    {
        await Clients.Caller.NoteUpdated(serverNote);
        return;
    }

    serverNote.X = x;
    serverNote.Y = y;
    await Clients.Others.NoteUpdated(serverNote);
}
It likewise finds the relevant Note and tries to lock it. In this case, it will likely extend its lock by calling TryLock unless it eventually hasn't moved for a full second which will make it possible for others to get the lock instead. If it is successful in getting or extending its lock then it updates the position of the note as expected and updates all other users of this update else it notifies the original caller of the updated state.
Finally, we just need to implement the methods for deleting a single note and clearing all notes.
public async Task DeleteNote(Guid id)
{
    if (StaticStorage.Notes.FirstOrDefault(note => note.Id == id) is not { } serverNote)
        return;

    if (!serverNote.TryLock(Context.ConnectionId))
        return;

    StaticStorage.Notes.Remove(serverNote);
    await Clients.All.NoteDeleted(id);
}
What we do in this method is very similar to what we do in the other method except for the fact that we do not want to update all other users once the lock is no longer active as the Note will have been removed at that point.
The ClearNotes hub method is the last one we need before having implemented IStickyNoteHub fully. It simply goes through the Ids of all sticky notes and tries to delete them one by one. It can likewise only delete each individual sticky note if no other user has a lock on it.
public async Task ClearNotes()
{
    var noteIds= StaticStorage.Notes.Select(note => note.Id).ToList();
    foreach (var id in noteIds)
    {
        await DeleteNote(id);
    }
}
While we are in the Server project let's configure the hub so that it is ready to be connected. We do this in Program.cs by calling AddSignalR on our service collection and by mapping our typed SignalR hub to an endpoint. I've made a very minimal setup like this:
Programs.cs
var builder = WebApplication.CreateBuilder(args);

builder.Services.AddSignalR();
builder.Services.AddCors();

var app = builder.Build();

app.UseHttpsRedirection();
app.UseCors(builder => builder.WithOrigins("https://localhost:7171")
    .AllowAnyMethod()
    .AllowAnyHeader());
app.MapHub<StickyNoteHub>("/stickynotehub");

app.Run();
I added the CORS settings as well since we are going to connect to the hub from our browser which expects CORS headers.
Typed SignalR Client
Now we are ready to implement our IStickyNoteClient client interface. This is where all the new stuff happens which enables us to make typed calls to the hub to listen to events from the hub with relative ease. We first need to add two packages to our Blazor project.
First, the client library for SignalR
dotnet add package Microsoft.AspNetCore.SignalR.Client
And then the source generator package that will make our life a piece of cake. This package is only available as a preview package as it was created during the preview development of .NET 7.
dotnet add package Microsoft.AspNetCore.SignalR.Client.SourceGenerator
Source generation setup
To bootstrap the source generation for our typed client and hub proxy we need to define two attributes that the source generator package will use to target certain partial methods.
HubServerProxyAttribute.cs
[AttributeUsage(AttributeTargets.Method)]
internal class HubServerProxyAttribute : Attribute { }
HubClientProxyAttribute.cs
[AttributeUsage(AttributeTargets.Method)]
internal class HubClientProxyAttribute : Attribute { }
The attributes are then used on these partial extension methods which make the source generator generate separate partial methods.
HubConnectionExtensions.cs
public static partial class HubConnectionExtensions
{
    [HubClientProxy]
    public static partial IDisposable ClientRegistration<T>(this HubConnection connection, T provider);

    [HubServerProxy]
    public static partial T ServerProxy<T>(this HubConnection connection);
}
Implementing IStickyNoteClient
Then we are ready to make the code-behind for our Index.razor page. We start off by defining some fields and overriding the OnInitializedAsync method which will be called once the page is created.
Index.razor.cs
public partial class Index : IStickyNoteClient
{
    private List<Note> notes = new();
    private IStickyNoteHub hubProxy = default!;
    private HubConnection connection = default!;

    protected override async Task OnInitializedAsync()
    {
        connection = new HubConnectionBuilder()
            .WithUrl("https://localhost:7210/stickynotehub")
            .Build();
        hubProxy = connection.ServerProxy<IStickyNoteHub>();
        _ = connection.ClientRegistration<IStickyNoteClient>(this);
        await connection.StartAsync();

        notes = await hubProxy.LoadNotes();
    }

    // Methods that implement IStickyNoteClient will be inserted below here
}
The first thing we did was to make the page implement IStickyNoteClient. We do this as we want the page itself to be what handles all notifications from the hub. Then we add a couple of fields. First a list of notes which will be our local copy of all notes and after this two fields that represent the abstraction of our hub which we can use to call the methods of the hub and the connection itself. In OnInitializedAsync we create the connection and make a proxy for our hub using the extension method we defined earlier. Then we register our page as the client for our connection, start the connection, and load all the initial notes if there are any.
Then we just need to implement the methods which IStickyNoteClient defines to handle the events coming from the hub. We start off with NoteCreated.
public Task NoteCreated(Note note)
{
    notes.Add(note);
    StateHasChanged();
    return Task.CompletedTask;
}
We simply add the new note to our local collection and update and force the UI to update by invoking StateHasChanged. Then we implement the method for handling a sticky note that has been updated.
public Task NoteUpdated(Note note)
{
    if (notes.FirstOrDefault(n => n.Id == note.Id) is not { } localNote)
        return Task.CompletedTask;

    localNote.Text = note.Text;
    localNote.X = note.X;
    localNote.Y = note.Y;
    localNote.LastLockingUser = note.LastLockingUser;
    localNote.LastEdited = note.LastEdited;

    StateHasChanged();
    return Task.CompletedTask;
}
This should look very familiar by now. We find the relevant Note, update its properties, and update the UI.
The last method which handles when a note is deleted is likewise pretty simple:
public Task NoteDeleted(Guid id)
{
    if (notes.FirstOrDefault(n => n.Id == id) is not { } localNote)
        return Task.CompletedTask;

    notes.Remove(localNote);
    StateHasChanged();
    return Task.CompletedTask;
}
Handling pointer events
Next we need to add a couple of methods to the code-behind that will handle different kinds of user input when the user moves the sticky notes around. We first write the method that handles when a sticky note starts being moved.
private (double x, double y)? anchor;
private Note? editNote;

public async Task Down(Note note, PointerEventArgs eventArgs)
{
    if (!await hubProxy.LockNote(note.Id)) return;

    note.Lock(connection.ConnectionId);
    anchor = (eventArgs.ClientX, eventArgs.ClientY);
    editNote = note;
}
It first tries to get a lock at the server through the hub proxy. If it got it then we lock our local copy and set two fields that we have added which will manage which note we are currently moving and what position the pointer was at the last time we saw it.
Next, we need to define what happens when we move the pointer.
public async Task Move(PointerEventArgs eventArgs)
{
    if (anchor is not (double x, double y) || editNote is null || !editNote.CanLock(connection.ConnectionId))
        return;

    editNote.X += eventArgs.ClientX - x;
    editNote.Y += eventArgs.ClientY - y;
    editNote.LastEdited = DateTimeOffset.UtcNow;
    anchor = (eventArgs.ClientX, eventArgs.ClientY);
    await hubProxy.MoveNote(editNote.Id, editNote.X, editNote.Y);
}
If either the anchor is null, there is no current edit Note, or if we can't lock the current Note then we do nothing. But if we were successful then we update the position of the current Note and when it was last edited which extends our local lock. We also update the anchor with our last position and finally tell the hub that we have moved the sticky note.
Then we just need to handle when the pointer is raised which means the user is done moving the sticky note.
public async Task Up(PointerEventArgs eventArgs)
{
    await Move(eventArgs);

    anchor = null;
    editNote = null;
}
We first invoke the Move method to update the position for the last time before setting both the edit Note and the anchor to null. Then we are ready to write the markup that will present the actual sticky notes.
Presenting the sticky notes
We first need a little CSS for our text and our markers (delete cross and pin). We added the following to the app.css file of our project which was pre-generated with the template.
app.css
html, body, #app, main {
    margin: 0;
    width: 100%;
    height: 100%;
    overflow:hidden;
}

.note-textarea {
    min-width: 100%;
    min-height: 100%;
    max-width: 100%;
    max-height: 100%;
    background-color: transparent;
    border: 0;
    font-family: cursive;
    font-size: 20px;
}

    .note-textarea:focus {
        outline: none;
    }

.note-markers {
    font-size: 20px;
    user-select: none;
    touch-action: none;
}
This will remove all margins and make use of the full width of the page all the way down to our page and the note-related classes are simple styling for our text and markers.
Then we can begin to fill out our page.
@page "/"

<button @onclick="() => hubProxy.CreateNote(10, 10)">Create Sticky Note ➕</button>
<button @onclick="hubProxy.ClearNotes">Clear All Sticky Notes ❌</button>

<svg width="100%" height="100%"
     @onpointerup="Up"
     @onpointerleave="Up"
     @onpointermove="Move">
    <defs>
        <filter id="shadow" x="0" y="0" width="200%" height="200%">
            <feOffset result="offOut" in="SourceAlpha" dx="5" dy="5" />
            <feGaussianBlur result="blurOut" in="offOut" stdDeviation="2.5" />
            <feBlend in="SourceGraphic" in2="blurOut" mode="normal" />
        </filter>
    </defs>

    @foreach (var note in notes)
    {
        <!-- This is where each Note will be drawn -->
    }

</svg>
We make two buttons in the top of the page for creating new sticky notes and clearing all notes. After this, we make an SVG tag that fills the rest of the page. The tag has three event handlers. Two for when the pointer is raised or the pointer leaves the SVG tag which will trigger the Up method and end the current drag if there is any. The third event handler is for when we move the pointer which will move the Note if there is an active drag. Inside the SVG tag, we define a filter that makes a blurred black-and-white shadow that we use on each Note and then we loop over all the notes and present them each individually.
For each Note we first draw a rectangle that represents the piece of paper. There is nothing special about it except for the fact that it changes color if the user can't lock the card. We also apply the filter that we defined before.
<rect fill="@(note.CanLock(connection.ConnectionId) ? "#FFFF8F" : "#FFDF8F")"
        x="@note.X.AsString()"
        y="@note.Y.AsString()"
        stroke="#DDDD80"
        stroke-width="1"
        width="200px"
        height="200px"
        filter="url(#shadow)">
</rect>
Then we need to draw the text that is on the Note. For this, we use the foreignObject SVG tag enables us to inline HTML in SVG which we use to inline a textarea.
<foreignObject x="@note.X" y="@((note.Y+30).AsString())" width="200px" height="170px">
    <textarea @bind=note.Text
                    @bind:event="oninput"
                    @bind:after="() => hubProxy.UpdateNoteText(note.Id, note.Text)"
                    disabled="@(!note.CanLock(connection.ConnectionId))"
                    class="note-textarea">
    </textarea>
</foreignObject>
We place the foreignObject in the same place as the rectangle, but shift it down 30 pixels to make space for the markers at the top. We then @bind the value of the textarea to the text of Note and change the binding event to be oninput instead of the default onchange to make updates trigger more often. Then we use the new @bind:after event to call UpdateNoteText on our hub which will trigger every time the text of the Note has been updated locally. We also disable the textarea itself if the Note can't be locked by the user.
The last part is just to make our two markers. For this, we use the SVG tag text. This tag has been overloaded by Blazor to explicitly start a markup section so we need to embed our two markers in an extra text tag.
<text>
    <text @onclick="() => hubProxy.DeleteNote(note.Id)"
            x="@note.X.AsString()"
            y="@note.Y.AsString()"
            alignment-baseline="before-edge"
            class="note-markers"
            style="pointer-events:@(note.CanLock(connection.ConnectionId) ? "inherit" : "none")">
        ❌
    </text>
    <text @onpointerdown="e => Down(note, e)"
            x="@((note.X+180).AsString())"
            y="@note.Y.AsString()"
            alignment-baseline="before-edge"
            class="note-markers"
            style="pointer-events:@(note.CanLock(connection.ConnectionId) ? "inherit" : "none")">
        @(note == editNote || !note.CanLock(connection.ConnectionId) ? "📌" : "📍")
    </text>
</text>
We place the delete cross on the left side of the Note and the pin on the right side. Both use alignment-baseline="before-edge" which aligns them towards the top of the Note vertically. For both markers, we disable pointer events if the Note can't be locked by the user. We also add that the pin switches icon if we ourselves are currently moving it or if someone else has the lock on it.
Then we are done and we can enjoy the result of our work in this short video.
You can check out the full code that was created in this post here: https://github.com/KristofferStrube/DistributedStickyNotes
You can try out the above demo yourself here: https://kristofferstrube.github.io/DistributedStickyNotes/
Why Blazor WASM?
Before closing off, I promised some people to talk about why I think it makes sense to look at using Blazor WASM together with SignalR event though Blazor Server is already Blazor with SignalR. I think it makes sense to use Blazor WASM when you have rich interactive applications as having a minimal delay for these interactions is essential. Apart from this using SignalR with Blazor WASM also enables us to be much more specific about what we actually send back and forward and we could even deploy limits to this with approaches like throttling. Apart from this, I also like that the Blazor WASM application can live without the connection where it can try to reconnect for a longer time, potentially present other information while reconnecting, and save the current state of the application and re-apply it once reconnected so that no information is lost.
Conclusion
In this post, we have walked through an example application that utilizes real-time communication. We have explored some approaches to manage concurrent work and interactions. We have looked at how to use typed SignalR hubs and how to use typed SignalR clients to enable end-to-end type safe real-time communication. In the end, we presented a demo of the project and reflected on why it makes sense to use Blazor WASM together with SignalR. We might continue this project in a future blog post touching on scaling using Azure SignalR Service and how to authenticate SignalR connection. If you have any questions or comments for this post then feel free to reach out.